Meal Prep Tools and Tips: The Complete Guide to Efficient Weekly Cooking
Table of Contents
- Introduction: The Meal Prep Revolution
- Essential Meal Prep Containers and Storage
- Kitchen Tools That Transform Meal Prep
- The Sunday Meal Prep Strategy
- Batch Cooking Techniques for Maximum Efficiency
- Food Safety and Storage Guidelines
- Meal Prep for Different Dietary Goals
- Time-Saving Tips and Shortcuts
- Conclusion: Your Meal Prep Success
- FAQ
Introduction: The Meal Prep Revolution
Picture this scenario: It’s 7 PM on a Wednesday. You’re exhausted from work, starving, and staring into a refrigerator containing random ingredients that don’t obviously combine into a meal. The takeout apps beckon. The drive-through calls. Fast food wins again—along with the guilt, the expense, and the nutritional compromise you promised yourself you’d avoid this week.
Now imagine a different reality: You open that same refrigerator and find perfectly portioned, ready-to-heat meals you prepared on Sunday. Grilled chicken with roasted vegetables. Quinoa bowls with black beans and salsa. Overnight oats ready for tomorrow’s breakfast. Chopped vegetables prepped for quick stir-fries. In ten minutes, you’re eating a nutritious, delicious, home-cooked meal that cost a fraction of takeout and aligns perfectly with your health goals. This is the meal prep promise—and it’s completely achievable.
Meal prep has exploded from niche bodybuilder practice to mainstream lifestyle strategy embraced by busy professionals, parents, students, fitness enthusiasts, and anyone seeking to eat better while spending less time, money, and mental energy on daily cooking decisions. The global meal prep container market alone exceeded $1.2 billion recently and continues growing at double-digit rates as more people discover that dedicating 2-4 hours on a weekend day can eliminate weekday cooking stress entirely while dramatically improving diet quality and food budget management.
While the following video highlights the topic of how to become an expert in meal preparation, there is still information lying in the exclusive details at the bottom of this article - information you may not have discovered yet. :
The benefits extend far beyond convenience. Research consistently shows that people who meal prep eat healthier diets with more vegetables, lean proteins, and whole grains while consuming fewer calories, less sodium, and less sugar than those relying on restaurant meals or last-minute cooking. Meal preppers save an average of $200-400 monthly compared to frequent restaurant eating—that’s $2,400-4,800 annually. The time savings compound throughout the week: instead of spending 45-60 minutes daily planning, shopping, cooking, and cleaning, you invest 2-4 hours once weekly and enjoy 15-minute meal assembly the rest of the week.
Beyond the practical benefits, meal prep provides psychological advantages often overlooked: the reduction of decision fatigue (what should I eat? is already decided), elimination of 5 PM panic about dinner, removal of temptation to make poor food choices when tired and hungry, and the satisfaction and control that comes from knowing exactly what you’re eating and how it was prepared.
However, successful meal prep requires more than good intentions. It demands the right tools making preparation and storage efficient and safe, proven strategies for batch cooking without burning out or creating boring repetitive meals, knowledge of proper food storage preventing waste and foodborne illness, organizational systems keeping you consistent week after week, and realistic expectations about what meal prep can and cannot do for your lifestyle.
This comprehensive guide provides everything you need to transform from meal prep novice to confident practitioner. We’ll identify the essential containers and storage solutions that make meal prep practical and safe, explore the kitchen tools and appliances that dramatically accelerate preparation, outline step-by-step strategies for efficient Sunday meal prep sessions, share batch cooking techniques that create variety while maximizing efficiency, explain critical food safety and storage guidelines preventing waste and illness, discuss how to adapt meal prep for different dietary goals and preferences, and reveal time-saving shortcuts and tips that experienced meal preppers use to make the process nearly effortless.
Whether you’re a complete beginner overwhelmed by the concept, an occasional meal prepper wanting to improve consistency and efficiency, a fitness enthusiast seeking optimal nutrition support, a busy parent trying to feed the family healthier meals without nightly cooking marathons, or someone simply tired of the daily “what’s for dinner?” question—this guide empowers you to make meal prep work for your life.
Meal prep isn’t about eating the same bland chicken and broccoli for seven days straight (unless you enjoy that—no judgment). It’s about food freedom: the freedom from daily cooking stress, the freedom to eat nutritious meals even when exhausted, the freedom from expensive restaurant dependency, and the freedom to spend your precious weeknight time on things you actually enjoy rather than scrambling to throw together dinner.
Your future self—the one enjoying a delicious home-cooked meal on Thursday night while your unprepared neighbors are waiting 45 minutes for delivery—will thank you for mastering these skills. Let’s begin your meal prep transformation.

1. Essential Meal Prep Containers and Storage Solutions
Understanding Container Materials
The foundation of successful meal prep is quality storage containers that keep food fresh, prevent leaks, withstand reheating, and stack efficiently in refrigerators and bags. Container material dramatically impacts safety, durability, and functionality.
Glass containers are the premium choice for meal prep, offering numerous advantages: completely non-reactive (won’t absorb flavors, odors, or stains), microwave and oven safe (remove lid), dishwasher safe, durable with proper care (lasting years or decades), and transparent (easily see contents without opening). Glass containers are heavier and more expensive than plastic but are the healthiest long-term option—no concerns about chemicals leaching into food even with repeated heating.
The primary consideration with glass is breakage risk. Borosilicate glass (Pyrex-style) withstands thermal shock better than standard glass, tolerating rapid temperature changes from freezer to oven without cracking. Tempered glass is stronger and more shatter-resistant. Quality glass containers with silicone or rubber-sealed lids provide excellent leak protection while maintaining the material benefits.
BPA-free plastic containers offer lightweight portability and affordability while avoiding the health concerns of older plastics containing BPA (bisphenol A). Modern food-grade plastics are safe for food storage when used properly—meaning avoiding extreme heat (don’t microwave unless explicitly labeled microwave-safe) and replacing when worn or scratched (damaged plastic can harbor bacteria and may leach chemicals).
Plastic advantages include light weight for portable meals, lower cost enabling larger container collections, shatter-proof durability for lunch bags and gym bags, and stackable designs maximizing refrigerator space. However, plastic stains from tomato-based and turmeric-containing foods, absorbs odors over time, and degrades faster than glass—typically needing replacement every 1-2 years with heavy use.
Stainless steel containers provide middle-ground option: durable, lightweight, non-reactive, and long-lasting. Stainless steel works beautifully for dry foods, salads, and cold items but cannot be microwaved and isn’t transparent (can’t see contents without opening). These excel as lunch containers for people with access to toasters ovens or who eat cold meals, but aren’t ideal for microwave reheating.
Container Sizes and Configurations
Meal prep container sizes should match your typical portion sizes and meal types:
Single-compartment containers (2-4 cups capacity): Ideal for simple one-dish meals—stir-fries, pasta dishes, grain bowls, soups, stews. These are the meal prep workhorses, and most people need 10-14 of these containers for a full week of lunches and dinners.
2-compartment containers (3-4 cups total): Separate protein from sides, or keep saucy items away from dry components. Useful for meals where you want separation—grilled chicken with rice and vegetables, but keeping the chicken separate from sauce until eating.
3-compartment containers (bento-style, 4-5 cups total): Create balanced plates with protein, grain, and vegetable compartments clearly defined. Particularly useful for portion control and ensuring balanced nutrition in every meal. Excellent for people tracking macros or managing specific dietary needs.
Small containers (1/2 to 1 cup): Perfect for dressings, sauces, dips, nuts, snacks, and breakfast components. Having 6-10 small containers enables customization—pack salad dressing separately, store sauce for pasta, portion snacks, and assemble breakfast parfaits.
Large containers (8+ cups): For batch cooking and ingredient storage—cooked grains, roasted vegetables, batch-cooked proteins. These aren’t for individual meals but for storing prepped ingredients used across multiple meals.
Essential Container Features
Airtight seals: Prevent leaks and extend food freshness. Test containers before purchasing—fill with water, seal lid, shake vigorously, and tip upside down. Any leakage means inadequate sealing.
Stackable design: Refrigerator space is precious. Containers should stack securely without tipping or sliding, and ideally nest when empty for storage efficiency.
Microwave-safe (if plastic): Not all plastic containers are microwave-safe. Check labels and only microwave plastic explicitly rated for it. When reheating, slightly open lids allowing steam to escape preventing pressure buildup.
Freezer-safe: If you prep meals for longer than a week, containers must withstand freezing temperatures without cracking. Glass can crack in freezers from thermal shock—leave space for expansion and avoid rapid temperature changes.
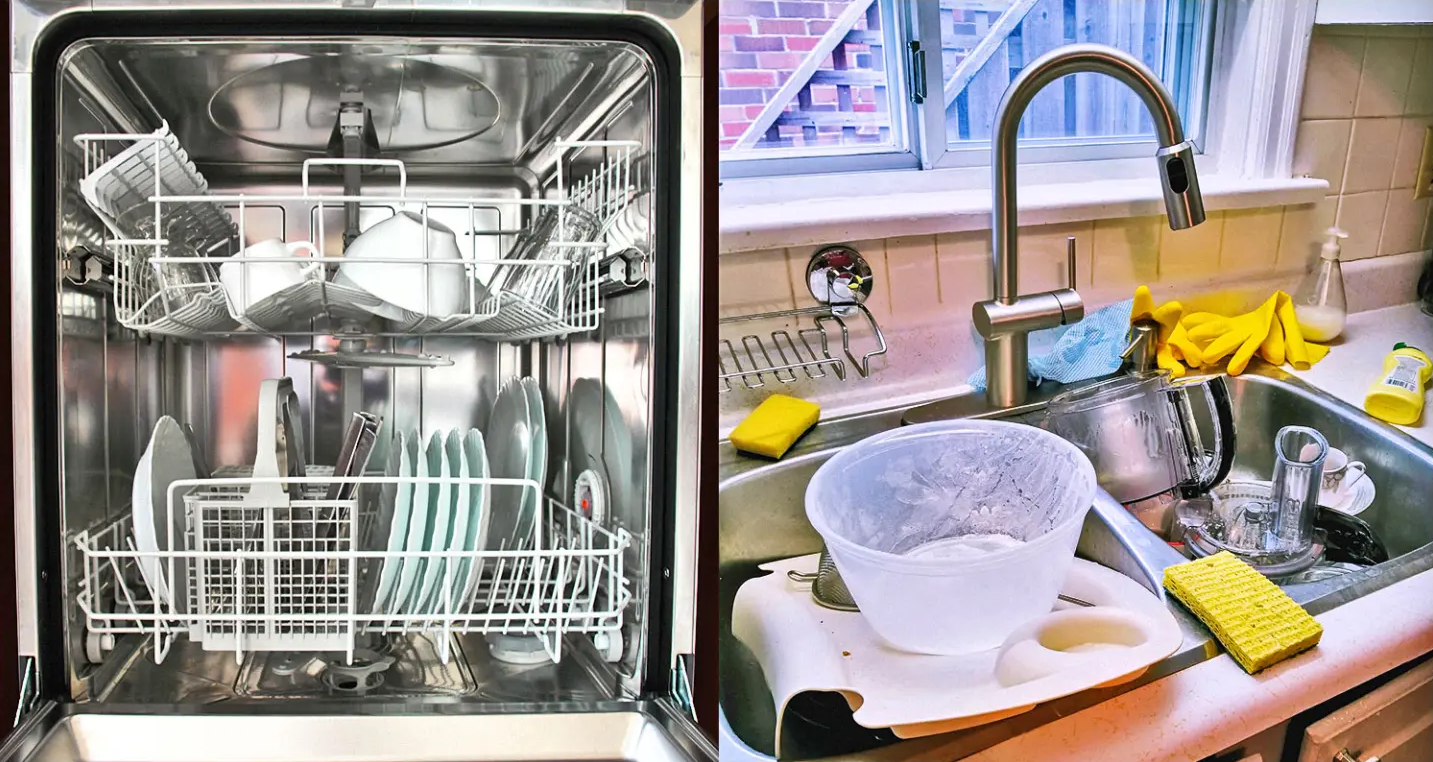
Dishwasher-safe: Hand washing dozens of containers weekly is tedious. Dishwasher-safe containers (top rack for plastic) save significant time.
Clear or transparent lids: Seeing contents without opening containers reduces food waste—you actually remember and use what you prepped rather than discovering mystery containers weeks later.
Specialized Storage Solutions
Mason jars: Perfect for salads (layered from bottom: dressing, hard vegetables, proteins, soft vegetables, greens), overnight oats, chia puddings, soups, and beverages. The wide mouth makes filling and eating easy, and glass ensures no flavor transfer or staining.
Silicone bags: Reusable alternatives to plastic bags, excellent for freezer storage, marinating meats, storing chopped vegetables, and portioning snacks. Many are dishwasher and microwave safe, reducing single-use plastic waste.
Vacuum-seal systems: For serious meal preppers storing large batches in freezers. Vacuum sealing removes air extending freezer life to 2-3 months versus 1 month for regular containers while preventing freezer burn. Initial investment ($50-150 for system plus ongoing bag costs) pays off for bulk freezer meal prep.
Portion control containers: Color-coded containers sized for specific macronutrients (protein, carbs, vegetables, fats) help people following specific dietary protocols. While not essential, they simplify meal construction for fitness goals.
Shop on AliExpress via link: wholesale-meal-prep-containers

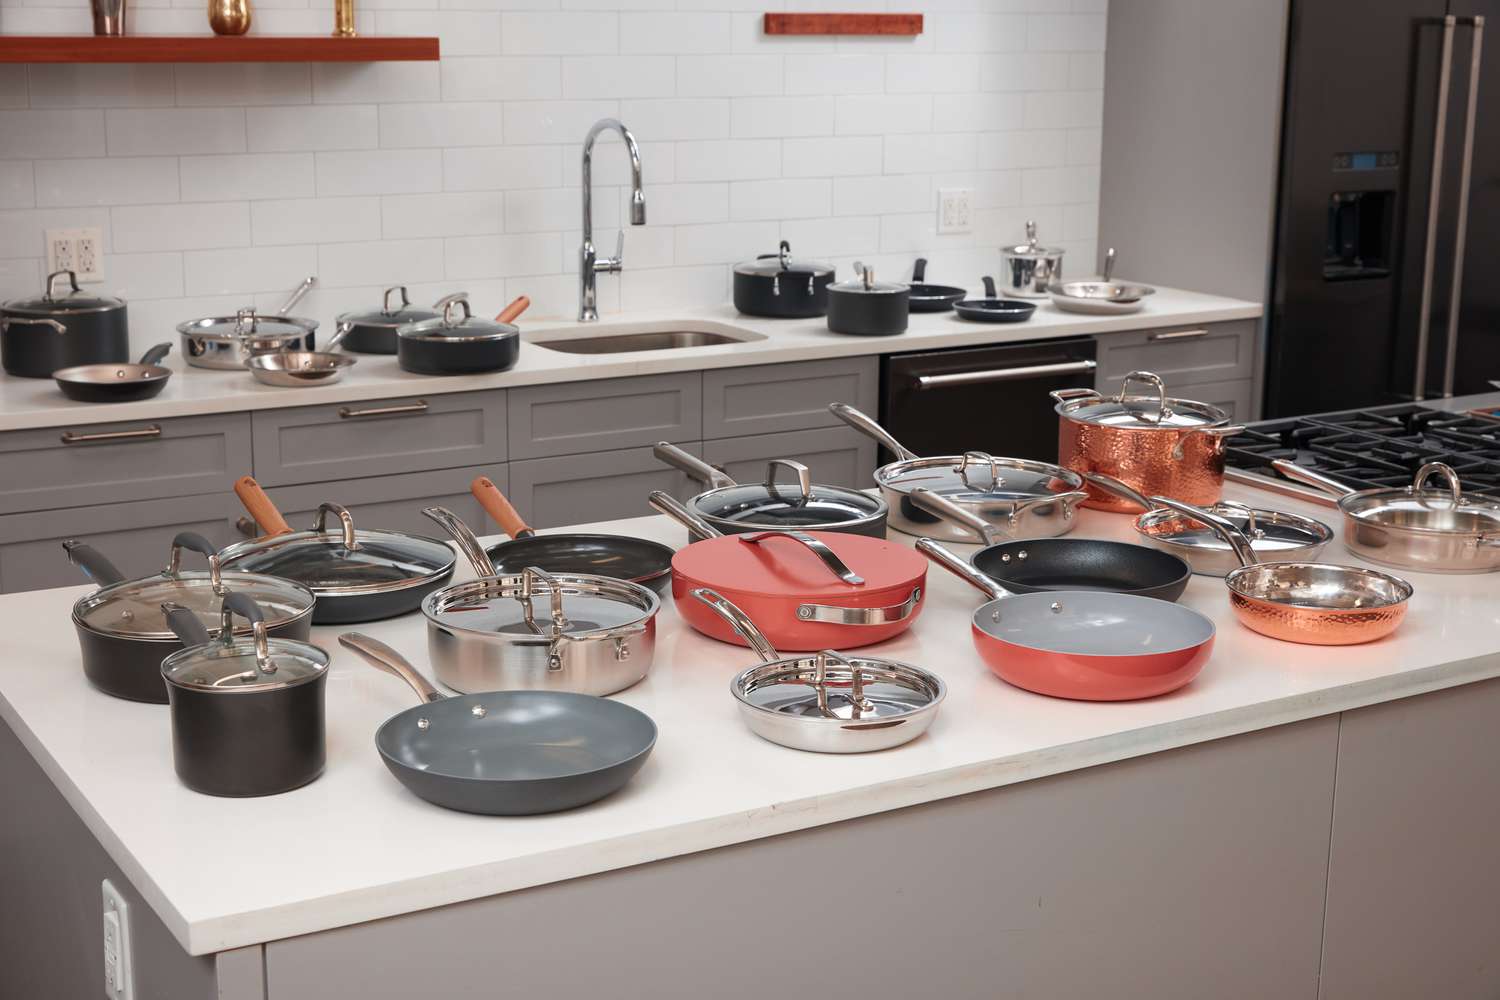
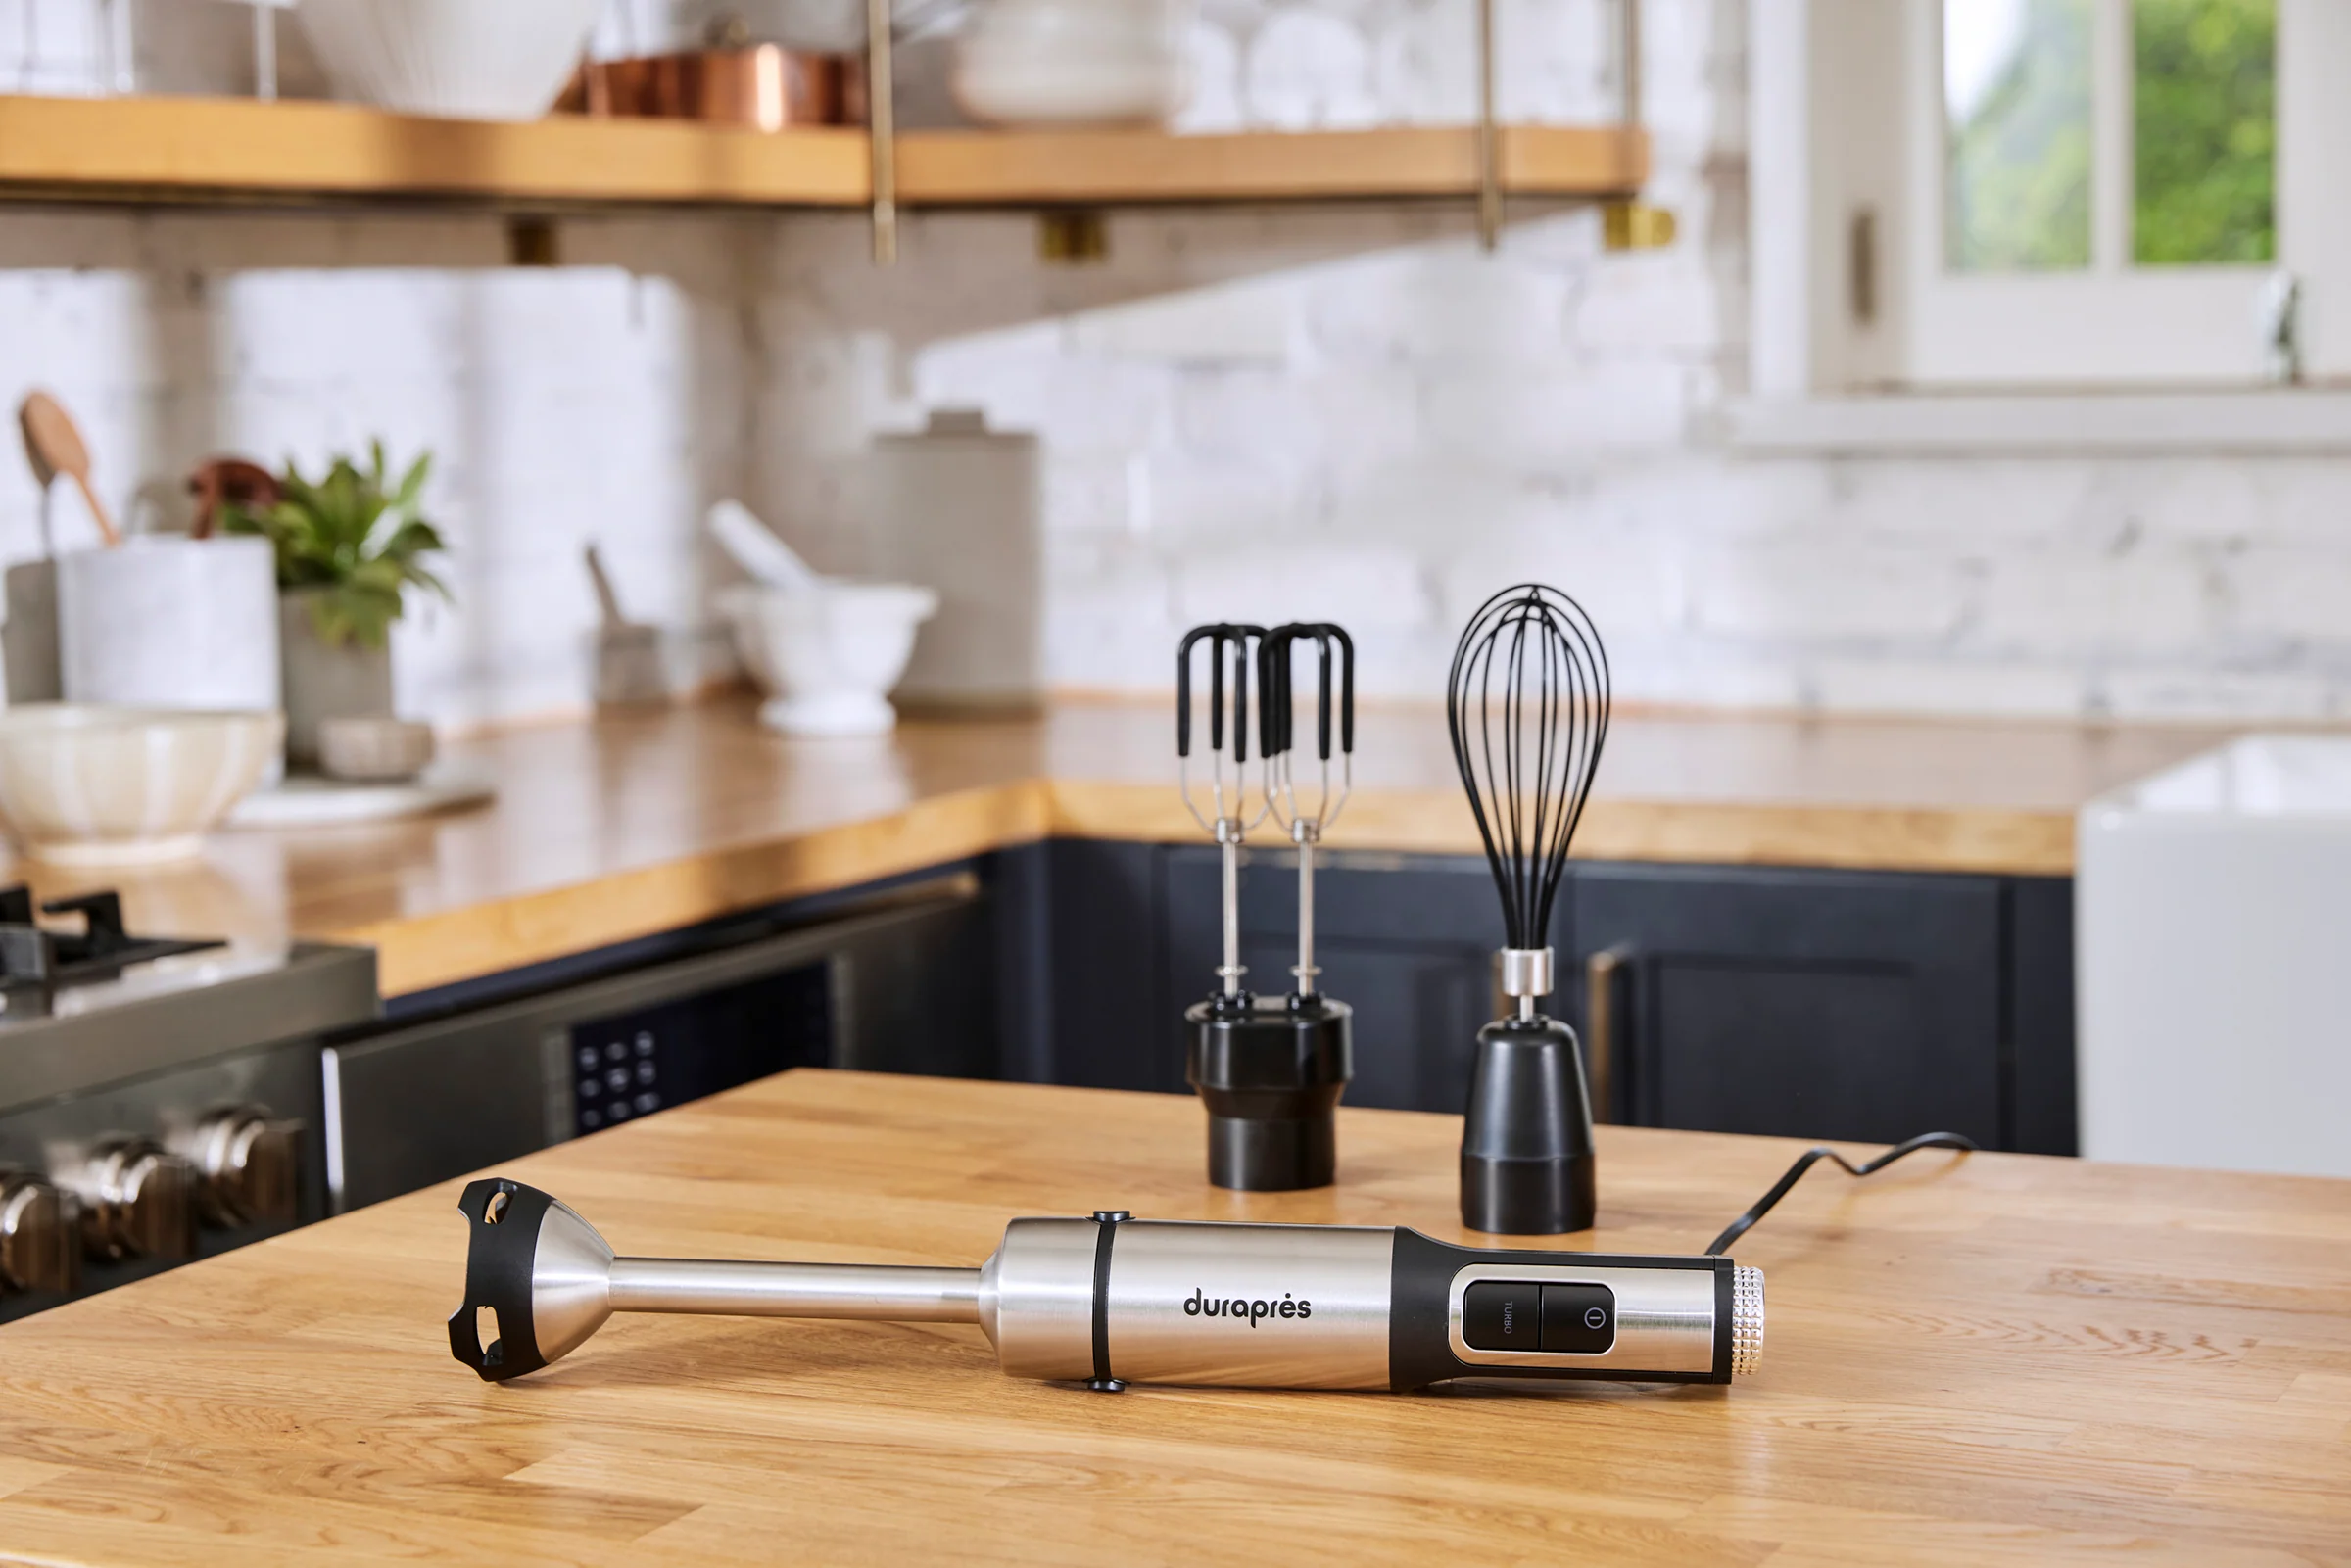
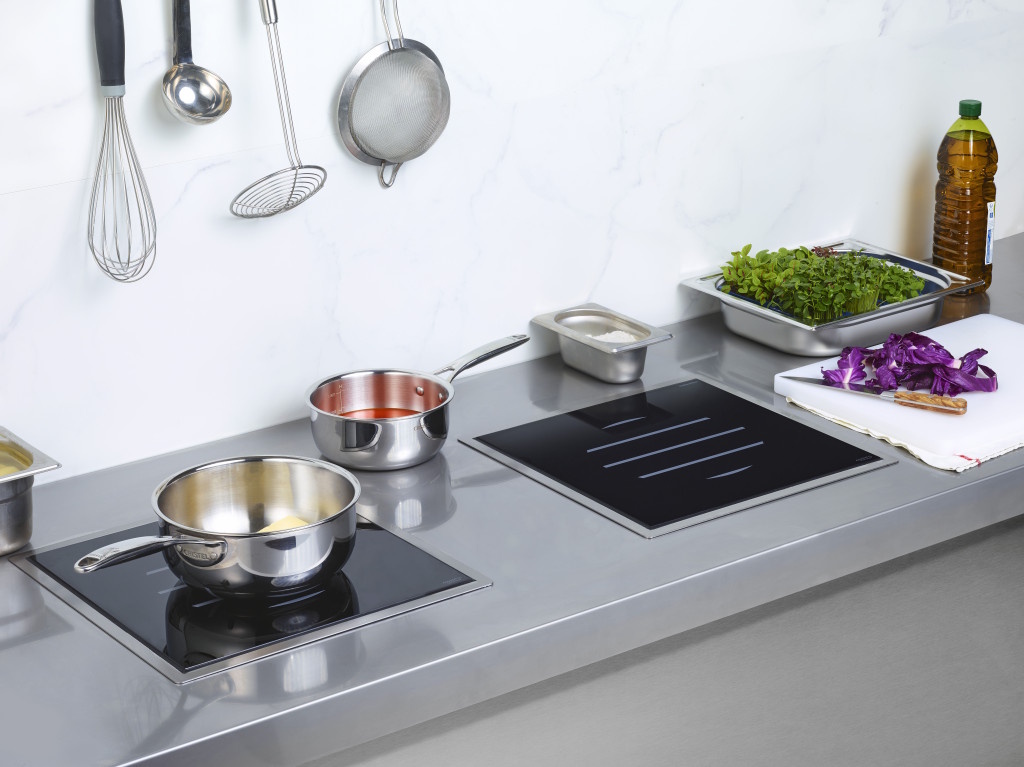
2. Kitchen Tools That Transform Meal Prep
Essential Knives and Cutting Tools
Quality chef’s knife (8-10 inch): The single most important kitchen tool. A sharp, well-balanced chef’s knife makes vegetable chopping, meat cutting, and herb mincing faster, safer, and less tiring. Invest in one excellent knife ($50-150) rather than mediocre knife sets—you’ll use this knife for 90% of prep tasks.
Keep knives sharp—dull knives are dangerous (requiring more force and prone to slipping) and inefficient. Professional sharpening every 6-12 months plus weekly honing with a steel maintains optimal edge.
Cutting boards (multiple): You need at least two: one for produce and one for raw meat/poultry preventing cross-contamination. Large cutting boards (12x18 inches minimum) provide ample work surface making chopping faster and safer. Plastic boards are dishwasher-safe and affordable; wood boards are gentler on knife edges but require hand washing and periodic oiling.
Kitchen shears: Cut herbs, trim fat from meat, open packaging, and dozens of other tasks faster than knives. Quality kitchen shears that come apart for cleaning prevent bacteria buildup.
Mandoline slicer: Creates uniform vegetable slices in seconds—perfect for salads, slaws, gratins, and chips. Mandolines are dramatically faster than knife slicing for large quantities. Use the safety guard—mandoline injuries are common and serious.
Food processor: For serious meal preppers, food processors revolutionize prep speed. Shred pounds of cabbage for slaw in 30 seconds, slice mushrooms in 10 seconds, make pesto or hummus in 1 minute. While not essential for beginners, food processors become invaluable as you prep larger quantities.
Appliances That Accelerate Cooking
Instant Pot or electric pressure cooker: The meal prep game-changer. Pressure cookers reduce cooking time by 50-70% while producing tender, flavorful results—dried beans in 30 minutes versus 3 hours, whole chickens in 25 minutes versus 90 minutes, pot roast in 60 minutes versus 4+ hours. The ability to cook large batches of grains, proteins, and soups quickly makes meal prep dramatically more efficient.
Set-it-and-forget-it convenience means you can be chopping vegetables while grains cook themselves, or start a roast before tackling other prep tasks. The Instant Pot specifically combines pressure cooking with slow cooking, rice cooking, sautéing, and yogurt making—genuinely versatile.
Sheet pans (multiple): Batch roasting vegetables and proteins in the oven is one of the most efficient meal prep techniques. Having 3-4 large sheet pans (half-sheet size, approximately 13x18 inches) allows roasting multiple items simultaneously—proteins on one pan, vegetables on another, maximizing oven efficiency.
Choose heavy, quality sheet pans that won’t warp under high heat. Line with parchment paper or silicone mats for easy cleanup and prevent sticking.
Slow cooker: While pressure cookers are faster, slow cookers excel at unattended cooking—load ingredients in the morning, return to perfectly cooked dinner. For meal prep, slow cookers handle large batches of chili, soups, stews, and shredded meats requiring minimal attention. A 6-quart slow cooker suits most households.
Rice cooker: If you eat rice regularly, rice cookers produce perfect results every time with zero attention. Set and forget—never scorched, undercooked, or overcooked rice again. Beyond rice, many rice cookers excel at other grains (quinoa, farro, barley) and can even steam vegetables simultaneously.
Immersion blender: Blend soups directly in the pot without transferring hot liquid to countertop blenders (safer, fewer dishes). Also makes smoothies, purees, and sauces quickly. Immersion blenders cost $25-50 and save significant time versus traditional blenders for many tasks.
Organization and Efficiency Tools
Measuring cups and spoons (multiple sets): Meal prep involves constant measuring. Having 2-3 sets of measuring tools prevents washing between each ingredient—one for dry ingredients, one for wet, one for oils/fats.
Mixing bowls (various sizes): Large bowls for tossing vegetables with oil and seasoning, medium bowls for marinating proteins, small bowls for prepped ingredients. Nesting bowl sets (6-8 bowls) provide all sizes while storing compactly.
Labels and markers: Absolutely essential. Label every container with contents and date prepared. After a few days in the refrigerator, you won’t remember which container holds chicken teriyaki versus chicken fajitas. Masking tape and permanent markers work; specialized removable labels are cleaner. Date everything—food safety depends on knowing how long items have been stored.
Kitchen timer or multiple timers: When cooking multiple dishes simultaneously, timers prevent overcooking or forgetting items. Many meal preppers use smartphone timers, but dedicated kitchen timers with loud alarms are more reliable.
Cooling racks: Cool cooked foods before refrigerating prevents condensation (which promotes bacterial growth and sogginess). Elevated cooling racks allow air circulation around foods—cookies, roasted meats, baked goods all cool faster and more evenly.
Portion scoop (ice cream scoop style): For portioning grain bowls, stews, casseroles, or baked goods into containers. A 1/2 cup or 1 cup scoop creates consistent portions faster than spooning.
Optional But Valuable Tools
Spiralizer: Creates vegetable noodles (zucchini, sweet potato, carrot) for low-carb pasta alternatives. While not essential, spiralizers add variety to meal prep options.
Food cooking thermometer: When cooking meat, poultry, seafood, and egg products, using a food thermometer helps prevent foodborne illness by ensuring food reaches a safe minimum internal temperature.
Kitchen scale: For people tracking macros or wanting precise portions, digital kitchen scales ($15-30) provide accuracy measuring tools cannot match. Weigh proteins, grains, and vegetables ensuring consistent calorie and macro targets.
**Garlic press:** If you use garlic frequently (which adds tremendous flavor to meal prep), a garlic press is faster and easier than mincing. Fresh garlic tastes dramatically better than pre-minced jarred garlic.
Shop on AliExpress via link: wholesale-kitchen-food-processor

3. The Sunday Meal Prep Strategy
Planning Your Meal Prep Session
Successful meal prep begins with planning—random cooking without strategy wastes time and creates imbalanced meals or boring repetition.
Step 1: Decide your meal prep scope (15 minutes)
How many meals are you preparing? Common approaches:
- Lunches only: 5 lunches for the work week
- Lunches and dinners: 10 total meals
- Full week: Breakfasts, lunches, dinners, snacks (21+ meals)
- Partial prep: Breakfast and lunch prepped completely; dinner ingredients prepped but assembled fresh
Be realistic about your capacity. Beginners should start with just lunches (5 meals) rather than attempting full-week prep. You can always expand once comfortable.
Step 2: Choose your meals (20 minutes)
Select 2-4 different meals preventing boredom while maintaining prep efficiency. Having 2-3 servings of each meal throughout the week provides variety without excessive complexity.
Consider:
- Protein variety: Don’t prep five chicken-based meals. Mix proteins—chicken, ground turkey, fish, tofu, beans.
- Flavor profiles: Vary cuisines—Mexican one meal, Asian another, Mediterranean a third.
- Cooking methods: Mix oven-roasted, pressure-cooked, slow-cooked, and raw (salads) preventing cooking method burnout.
- Reheating compatibility: Some foods reheat better than others. Rice-based meals, stews, and casseroles reheat excellently. Crispy foods and delicate fish don’t.
Step 3: Create your prep list (15 minutes)
List every ingredient needed and quantities. Check your pantry and refrigerator crossing off items you have. This becomes your shopping list.
Group by store section (produce, meat, dairy, pantry) making shopping efficient. Many people shop Saturday and prep Sunday—fresh ingredients, minimal shopping-day stress.
Step 4: Batch similar tasks
Plan your prep order for maximum efficiency:
- Start slow cooker or pressure cooker items (these take longest)
- Prep and roast oven items (proteins and vegetables)
- While oven works, chop raw ingredients (vegetables for salads, stir-fry prep)
- Cook grains (rice, quinoa in rice cooker)
- Assemble meals into containers
- Clean as you go (don’t leave massive cleanup for the end)
The 3-Hour Sunday Prep Timeline
Hour 1: Cooking proteins and grains (with minimal active time)
0:00-0:10 – Start long-cooking items:
- Load Instant Pot with chicken breasts for shredding (25 minutes cooking time)
- Start rice cooker with week’s grains (30-40 minutes)
- Preheat oven to 400°F
0:10-0:25 – Prep proteins for roasting:
- Season chicken thighs or salmon
- Prepare sheet pan with vegetables
- Mix ground turkey with seasonings for meatballs/patties
0:25-0:30 – Load oven:
- Sheet pan with proteins
- Sheet pan with roasted vegetables (sweet potatoes, Brussels sprouts, broccoli)
0:30-1:00 – While oven and pressure cooker work, prep vegetables:
- Chop vegetables for salads
- Slice vegetables for stir-fries
- Prep any raw snacks (carrot sticks, cucumber slices)
- Portion fruits into snack containers
Hour 2: Assembly and finishing
1:00-1:10 – Remove oven items, start new batch:
- Remove cooked proteins and vegetables from oven
- Load next batch if cooking multiple proteins
- Shred pressure-cooked chicken
1:10-1:30 – Cook quick-cooking items:
- Sauté vegetables for stir-fries
- Make hard-boiled eggs (if including in meal prep)
- Prepare any sauces or dressings
1:30-2:00 – Assemble meals into containers:
- Portion proteins into containers
- Add grains/starches
- Add vegetables
- Keep components separate if they shouldn’t mix until eating (dressings, sauces)
Hour 3: Final items and cleanup
2:00-2:20 – Finish breakfast and snack prep:
- Assemble overnight oats
- Portion yogurt parfaits
- Pack snack containers
2:20-2:40 – Label everything:
- Write contents and date on every container
- Organize refrigerator with meal prep items together
- Stack containers efficiently
2:40-3:00 – Clean kitchen:
- Wash remaining dishes
- Wipe counters
- Put away tools and ingredients
This timeline is flexible—your first session might take 4 hours; experienced preppers often finish in 2-2.5 hours. The efficiency comes from overlapping tasks: while proteins roast, you’re chopping vegetables; while grains cook, you’re assembling containers.
Meal Prep Shortcuts for Busy People
Pre-cut vegetables: Buying pre-chopped onions, pre-riced cauliflower, or vegetable medleys costs 30-50% more than whole vegetables but saves 30-45 minutes prep time. For busy people, this trade-off is worthwhile.
Rotisserie chicken: Purchasing cooked rotisserie chicken provides instant protein. Remove meat, portion into containers—5-10 minutes versus 45+ minutes roasting and shredding chicken yourself.
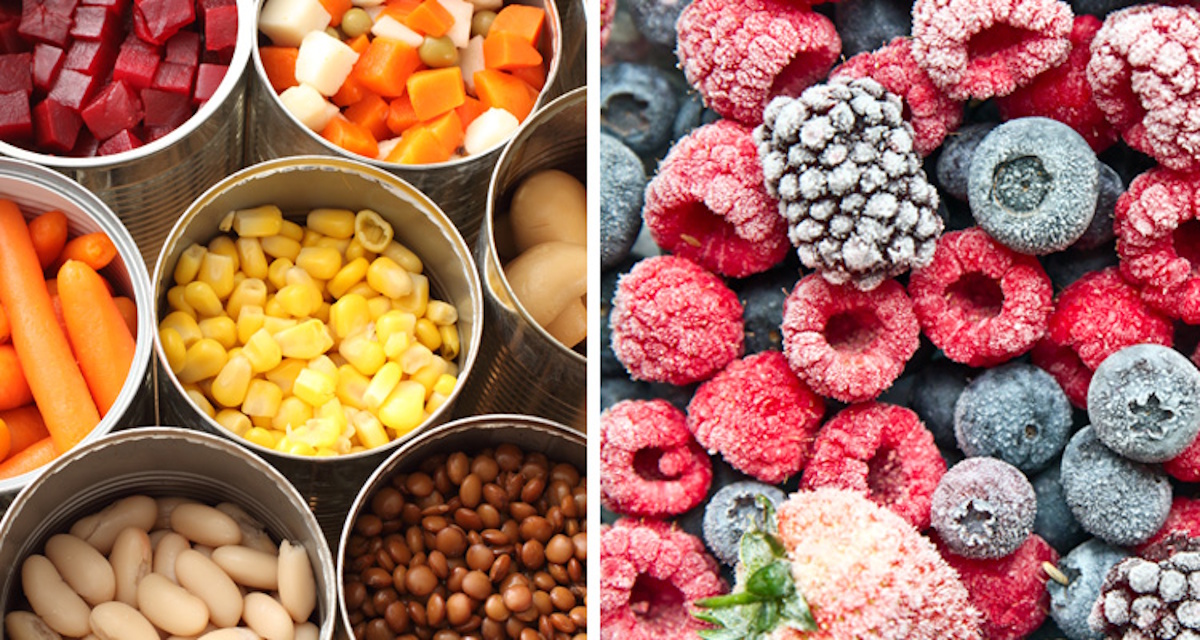
Frozen vegetables: Nutritionally equivalent to fresh (sometimes superior—flash-frozen at peak ripeness) and require zero prep. Frozen broccoli, spinach, and mixed vegetables go straight from freezer to cooking with no washing or chopping.
Pre-cooked grains: Frozen brown rice, quinoa, and grain medlies microwave in 3 minutes versus 30-45 minutes cooking from dry. Convenient for adding to bowls without dedicating rice cooker space or time.
Minimal-cook meals: Include some meals requiring minimal cooking—salads with rotisserie chicken, grain bowls with canned beans, wraps with deli meat. Not every meal needs extensive cooking.
4. Batch Cooking Techniques for Maximum Efficiency
Sheet Pan Batch Roasting
Sheet pan cooking is the meal prep MVP—minimal hands-on time producing large quantities of delicious roasted proteins and vegetables.
Proteins: Chicken thighs, chicken breasts, salmon fillets, and meatballs all roast beautifully. Season proteins with different spice blends on separate pans creating variety—Italian herbs on one batch, taco seasoning on another, teriyaki on a third.
Vegetables: Almost any vegetable roasts well—Brussels sprouts, broccoli, cauliflower, sweet potatoes, carrots, bell peppers, zucchini, asparagus. Toss with olive oil, salt, and pepper; spread in single layer; roast at 400-425°F for 20-35 minutes (timing depends on vegetable density and desired caramelization).
Pro tips:
- Don’t overcrowd pans—vegetables steam instead of roast when crowded. Better to use 3 pans properly than 2 overstuffed pans.
- Cut vegetables uniform sizes ensuring even cooking.
- Flip halfway through for even browning.
- Different vegetables have different cooking times—start dense vegetables (sweet potatoes, carrots) first, add quick-cooking vegetables (zucchini, asparagus) later.
Instant Pot Batch Cooking
Proteins: Whole chickens, chicken breasts for shredding, pot roast—all cook dramatically faster under pressure while staying tender and flavorful.
Grains and legumes: Dried beans (no soaking required!) cook in 25-40 minutes. Brown rice cooks in 22 minutes. Quinoa cooks in 1 minute (plus natural pressure release). The ability to cook these staples faster than stovetop or rice cooker while you focus on other prep is invaluable.
Soups and stews: Load ingredients, set pressure cook setting, return to finished meal. Pressure cooking develops flavors faster than traditional methods.
Batch cooking strategy: Use pressure cooker for one large batch (chicken for shredding, beans, or soup) while using oven for other components. The pressure cooker works independently—set and forget.
Slow Cooker Overnight Prep
Overnight cooking: Load slow cooker before bed with chili, or soup. Wake to finished food ready for portioning. This “sleep cooking” essentially adds 6-8 hours of cooking time to your day without active involvement.
Morning start: Load slow cooker Sunday morning before running errands. Return to ready-to-portion meals.
Best slow cooker meals for prep:
- Chili (turkey, beef, or vegetarian)
- pulled chicken
- Beef stew
- Whole chickens (incredibly tender, fall-off-bone meat)
- Soup bases
Double and Triple Batch Cooking
When cooking, automatically double or triple quantities storing extras:
Proteins: Grill triple the chicken you need for one meal—use one portion immediately, meal prep the rest.
Grains: Make 6 cups of rice instead of 2. Use some fresh, refrigerate some for week’s meals, freeze some for later weeks.
Sauces and dressings: Make large batches of commonly-used sauces (tomato sauce, pesto, salad dressings) portioning into small containers or freezing in ice cube trays.
This “future batch cooking” means every cooking session contributes to future meal prep, gradually building ingredient reserves reducing future prep time.
Shop on AliExpress via link: wholesale-instant-pot-pressure-cooker

5. Food Safety and Storage Guidelines
The Critical Temperature Danger Zone
Bacteria multiply rapidly between 40°F and 140°F (the “danger zone”). Food safety requires keeping hot foods hot (above 140°F) and cold foods cold (below 40°F) while minimizing time food spends in the danger zone.
Cooling cooked foods safely:
The 2-hour rule: Cooked food left at room temperature for more than 2 hours is unsafe (1 hour if room temperature exceeds 90°F). This means you must refrigerate meal prep within 2 hours of cooking.
Rapid cooling technique: Large quantities of hot food cool slowly, remaining in the danger zone for extended periods. Speed cooling by:
- Dividing large batches into smaller, shallower containers (more surface area = faster cooling)
- Placing containers on cooling racks allowing air circulation
- Stirring occasionally releasing internal heat
- Using ice baths for very large quantities (large container in larger container filled with ice water)
Never refrigerate very hot food: Putting steaming hot food in refrigerators raises internal refrigerator temperature, warming other foods and forcing the refrigerator to work harder. Wait until food reaches room temperature or is only warm (not hot) before refrigerating.
Refrigerator Storage Timelines
Different foods have different refrigerator shelf lives. Proper storage and realistic timelines prevent foodborne illness:
Cooked proteins:
- Chicken, turkey : 3-4 days
- Beef, lamb: 3-5 days
- Fish and seafood: 2-3 days
- Hard-boiled eggs: 1 week
Cooked grains and legumes:
- Rice, quinoa, pasta: 3-5 days
- Cooked beans: 3-5 days
Cut raw vegetables:
- Heartier vegetables (carrots, celery, broccoli): 5-7 days
- Delicate vegetables (lettuce, cucumber): 3-5 days
- Cut fruit: 3-5 days
Meal assembled in containers:
- Complete meals: 3-4 days maximum
Strategic meal ordering: Eat fish and seafood meals first (Days 1-2), beef meals middle of week (Days 3-4), and chicken meals later (Days 4-5). This accounts for varying protein shelf lives.
The smell/look test is unreliable: Food can harbor dangerous bacteria without looking or smelling bad. Don’t rely on sensory evaluation—follow timelines.
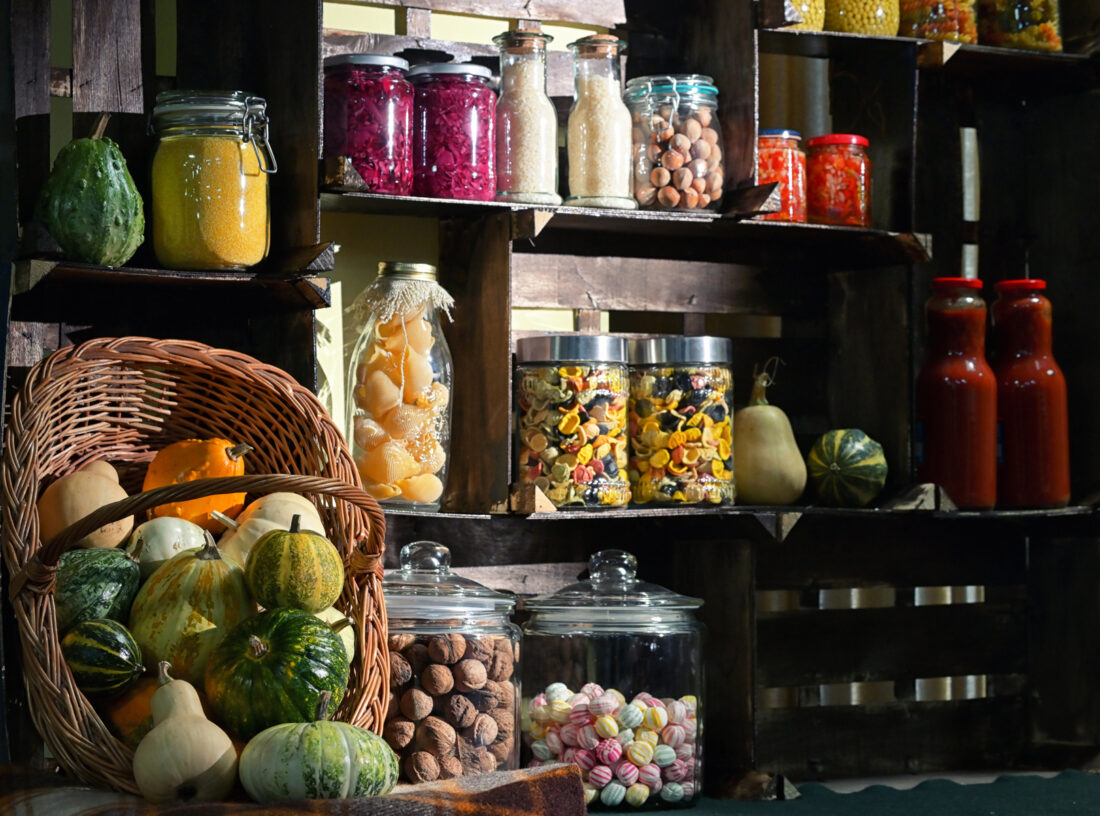
Freezer Storage Solutions
Freezing dramatically extends meal prep timeline—prepare meals for 2-3 weeks or even months rather than just one week.
Freezer-friendly meals:
- Soups, stews, chilis
- Cooked grains (rice, quinoa)
- Cooked proteins (chicken, beef—not fish)
- Casseroles
- Burritos and wraps
- Cooked beans
Foods that don’t freeze well:
- Raw vegetables with high water content (lettuce, cucumber, celery)
- Cooked potatoes (texture becomes grainy)
- Cream-based sauces (separate and curdle)
- Fried foods (lose crispiness)
Proper freezer storage:
- Use freezer-safe containers or bags
- Remove as much air as possible (prevents freezer burn)
- Label with contents and date frozen
- Freeze in single-serving portions (easier to thaw only what you need)
- Maintain freezer at 0°F or below
Freezer timelines:
- Cooked meals: 2-3 months
- Cooked proteins: 2-6 months
- Soups and stews: 2-3 months
Thawing safely: Thaw frozen meals in refrigerator overnight (safest), in cold water (change water every 30 minutes), or in microwave on defrost setting. Never thaw at room temperature (bacteria multiply in danger zone).
Preventing Cross-Contamination
Separate cutting boards: Use one board for produce, another for raw meat/poultry preventing bacteria transfer.
Wash hands frequently: Before handling food, after handling raw meat, before assembling containers—frequent hand washing is critical.
Clean surfaces thoroughly: Wipe counters with hot soapy water or sanitizing spray between tasks, especially after handling raw proteins.
Store properly in refrigerator: Raw meat on bottom shelves prevents drips contaminating other foods. Meal prep containers on middle/upper shelves.
Use separate utensils: Don’t use the same spoon for raw meat marinade and cooked food. Have clean utensils for each task.
6. Meal Prep for Different Dietary Goals
Weight Loss Meal Prep
Portion control: Pre-portioned meals prevent overeating. Use compartmentalized containers creating built-in portion awareness—protein portion, grain portion, vegetable portion clearly defined.
Calorie tracking: Weigh and measure ingredients during prep, calculate total calories per container. Many meal preppers use apps (MyFitnessPal, Lose It) tracking recipes and dividing by portions.
Volume eating: Emphasize low-calorie, high-volume vegetables filling containers without excessive calories. Large salads, roasted vegetable medleys, vegetable-based soups create satisfying portions with minimal caloric density.
Meal structure: Build meals around lean proteins (chicken breast, fish, turkey, tofu), complex carbohydrates (brown rice, quinoa, sweet potato), and large quantities of non-starchy vegetables. This combination provides satiety, nutrition, and reasonable calories.
Muscle Building Meal Prep
Protein prioritization: Each meal needs adequate protein supporting muscle growth—typically 25-40 grams per meal depending on body size and goals.
Caloric surplus: Building muscle requires eating above maintenance calories. Meal prep ensures consistent caloric intake rather than skipping meals or under-eating when busy.
Meal frequency: Many bodybuilders eat 4-6 meals daily. Meal prep makes this feasible—having pre-portioned meals available every 3-4 hours.
Carbohydrate timing: Strategic carbohydrate intake around training—having easily accessible pre and post-workout meals ensures optimal nutrition timing.
Example meal prep: Grilled chicken with brown rice and broccoli (4-5 servings), lean ground beef with sweet potato and green beans (4-5 servings), salmon with quinoa and asparagus (3-4 servings), Greek yogurt with berries and granola (5 servings for breakfasts).
Vegetarian and Vegan Meal Prep
Protein variety: Plant-based proteins—tofu, tempeh, seitan, legumes (chickpeas, black beans, lentils), edamame, quinoa. Varying protein sources ensures complete amino acid profiles and prevents monotony.
Batch cooking legumes: Dried beans and lentils cook in large batches (Instant Pot is perfect), portioning into containers for multiple meals. Much cheaper than canned beans and customizable seasoning.
Grain and vegetable bowls: Build meals around grains (rice, quinoa, farro) with roasted vegetables, plant proteins, and flavorful sauces (tahini, peanut sauce, chimichurri).
**Freezer-friendly vegan meals:** Many vegan meals freeze excellently—vegetable curries, bean-based chilis, vegetable soups, grain bowls. This allows longer-term prep reducing weekly time commitment.
Keto and Low-Carb Meal Prep
Focus on fats and proteins: Meals built around fatty proteins (salmon, chicken thighs, ground beef), healthy fats (avocado, nuts, cheese, olive oil), and low-carb vegetables (leafy greens, cruciferous vegetables, zucchini).
Minimize grains and starches: Traditional meal prep staples (rice, quinoa, pasta, sweet potatoes) are too high-carb for keto. Replace with cauliflower rice, zucchini noodles, or simply larger vegetable portions.
Fat-based sauces: Creamy, fatty sauces (alfredo, pesto, cheese sauces) add flavor and support ketogenic macros.
Example keto meal prep: Grilled chicken thighs with sautéed spinach and garlic, ground beef taco bowls with cauliflower rice, salmon with roasted Brussels sprouts and avocado, cheese and vegetable frittatas.
Shop on AliExpress via link: wholesale-portion-control-containers

7. Time-Saving Tips and Shortcuts
The “Cook Once, Eat Twice” Method
Every time you cook dinner, automatically double the recipe. Eat one portion for dinner, pack the other into meal prep containers for later in the week. This “invisible meal prep” happens during regular cooking without dedicated prep sessions.
Example: Making chicken stir-fry for dinner Tuesday? Make double—dinner for tonight, lunch containers for Thursday and Friday. This gradual approach builds meal prep inventory without Sunday marathons.
Theme-Based Prep
Assign themes to streamline decisions and shopping:
- Monday: Mexican (chicken fajita bowls, burrito bowls)
- Tuesday: Italian (chicken with marinara, pasta dishes)
- Wednesday: Asian (stir-fries, teriyaki bowls)
- Thursday: Mediterranean (Greek chicken, hummus bowls)
- Friday: American comfort (meatloaf, burgers, casseroles)
Themes provide variety while simplifying planning and shopping—you know which ingredients you need for each theme.
Ingredient Prep Instead of Full Meals
Some people prefer prepping ingredients rather than complete meals, assembling fresh throughout the week. This approach provides flexibility while eliminating weeknight chopping:
Sunday ingredient prep:
- Chop all vegetables for the week (store in containers)
- Cook proteins (chicken breasts, ground beef)
- Cook grains
- Make 2-3 sauces/dressings
Weeknight assembly: Combine prepped ingredients into fresh meals—stir-fry with prepped vegetables and protein takes 10 minutes instead of 45.
This method suits people who enjoy cooking but hate prep work, or those wanting maximum freshness and flexibility.
Strategic Grocery Shopping
Shop with detailed list: Aimless grocery shopping wastes time and money. Organized lists grouped by store section (produce, meat, dairy, pantry) make shopping efficient.
Shop once weekly: Consolidate shopping into one trip rather than multiple visits saving time and reducing impulse purchases.
Online grocery ordering: Many grocery stores offer online ordering with curbside pickup or delivery. While costing slightly more ($5-10 service fees), the time savings (1 hour shopping becomes 15 minutes pickup) and reduced impulse buys often justify the cost. Order Saturday, pickup Sunday morning before prep.
Simplify Without Sacrificing Quality
Limit recipes: Don’t attempt five different elaborate recipes weekly. Two main meals (each made 2-3 times) plus simple breakfasts and snacks is plenty. Simplicity prevents burnout.
Repeat successful meals: When you find meal prep recipes you genuinely enjoy, repeat them. Meal prep doesn’t require constant novelty—it requires sustainable, enjoyable eating.
Embrace simple seasonings: Meals don’t need complex sauces. Olive oil, salt, pepper, garlic, and one additional spice (Italian herbs, taco seasoning, curry powder) create delicious food without complicated recipes.
One-pot/one-pan meals: Recipes using single pots or pans minimize cleanup. Sheet pan dinners, Instant Pot meals, and slow cooker recipes reduce dishwashing substantially.
Clean-as-You-Go Philosophy
Wash dishes during downtime: While proteins roast or grains cook, wash prep dishes. Never let dirty dishes accumulate—address them during cooking downtime.
Wipe counters between tasks: Keep workspace clean and organized reducing final cleanup.
Organize tools before starting: Lay out needed tools and ingredients before beginning. This “mise en place” (everything in place) prevents scrambling mid-prep and reduces forgotten ingredients.
Conclusion: Your Meal Prep Success
Meal prep transforms from overwhelming concept to manageable routine through proper tools, proven strategies, and realistic expectations. You don’t need perfect execution—you need consistent progress. Your first meal prep session will be clumsy, take longer than expected, and probably produce less-than-perfect results. That’s completely normal and expected.
The second session goes faster. By the fourth or fifth, you’ve developed efficient workflows and know which recipes work for your preferences and schedule. Within 2-3 months, meal prep becomes automatic—a simple Sunday routine saving countless hours and dollars throughout the week while ensuring you eat exactly how you want regardless of daily chaos.
Start small. Prep just lunches for the first few weeks. Once comfortable, add dinners or breakfasts. Gradually expand your container collection, your recipe repertoire, and your efficiency. Meal prep is marathon, not sprint—sustainable habits beat perfect-but-unsustainable efforts.
Future comfort comes from developing this skill.. The version of you rushing home hungry on Wednesday evening, opening the refrigerator to find ready-to-heat nutritious meals you prepared three days ago—that person is grateful, healthy, and has reclaimed precious time and mental energy for things that actually matter.
Meal prep isn’t about restriction or punishment. It’s about freedom—freedom from last-minute stress, freedom from poor food choices made when exhausted, freedom from expensive restaurant dependency, and freedom to spend your limited time and energy on what you truly value. That freedom is worth every minute invested in Sunday prep.
Your meal prep journey starts now. Gather your containers, choose your first recipes, set aside a few hours this weekend, and begin. The skills you build will serve you for decades, creating healthier eating patterns, financial savings, and life simplification that compounds year after year.
Welcome to the meal prep revolution. Your well-fed, organized, stress-free future self is waiting.
Frequently Asked Questions
Q: How long does meal prep really take?
A: For beginners, expect 3-4 hours for a full week of lunches (5 meals). With experience, this drops to 2-3 hours. If prepping lunches and dinners (10 meals), budget 4-5 hours initially, reducing to 3-4 hours with practice. The time investment happens once weekly rather than 45-60 minutes daily cooking—net time savings of 3-4 hours weekly.
Q: Won’t eating the same meals every day get boring?
A: You don’t have to eat identical meals daily. Prepare 2-3 different meals, having each 2-3 times throughout the week. Use different sauces, seasonings, or serving styles creating variety from same base ingredients. Many people find the reduced decision-making actually reduces food boredom—no daily agonizing over dinner choices.
Q: Is meal prep safe—can food really stay fresh for a week?
A: Yes, with proper storage and food safety practices. Most cooked proteins and complete meals stay safe 3-4 days refrigerated. Strategic ordering (eat fish meals first, chicken later) and proper storage (airtight containers, refrigerator at 40°F or below) ensures safety. For longer storage, freeze portions thawing throughout the week.
Q: What if I don’t have 3-4 hours on Sundays?
A: Adapt meal prep to your schedule. Prep on Saturday, or split between Saturday and Sunday (proteins Saturday, vegetables and assembly Sunday). Some people prep Wednesday evening for Thursday-Friday, then Sunday for Monday-Wednesday. The beauty of meal prep is flexibility—find the schedule that works for you.
Q: Do I need expensive equipment to meal prep?
A: No. Basic meal prep requires: 10-15 storage containers ($20-40), one good knife ($30-50), cutting board ($15), sheet pans ($20-30), and basic pots and pans most kitchens already have. Total startup cost is $100-150 if starting from nothing. While tools like Instant Pots and food processors improve efficiency, they’re optional—not required.
Q: What are the best meals for beginners to prep?
A: Start with simple, forgiving meals: chicken and rice bowls with roasted vegetables, ground turkey taco bowls, pasta with marinara and chicken, stir-fries with frozen vegetables. These are hard to mess up, reheat well, and use basic ingredients most people enjoy.
Q: How do I prevent meals from getting soggy or gross?
A: Store wet components separately from dry components. Pack dressings and sauces in small containers, adding when eating. Use proper containers with tight seals. Avoid packing very hot food (causes condensation). Some foods inherently reheat better than others—learn which meals work best for your preferences.
Q: Can I meal prep if I have dietary restrictions or allergies?
A: Absolutely. Meal prep actually helps manage dietary restrictions—you control every ingredient ensuring nothing problematic enters your food. Gluten-free, dairy-free, vegan, keto, paleo—all adapt perfectly to meal prep. Controlling ingredients is often easier than navigating restaurant menus with restrictions.
Articles related:


Tags
📧 Get More Articles Like This
Subscribe to receive product reviews and buying guides in your inbox!
We respect your privacy. Unsubscribe at any time.